
Inking and Quilting
It’s Beautiful When They Come Together

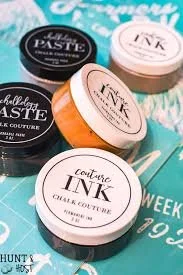
Many of you know that I love to chalk using our Chalkology Chalk Pastes—but did you know we can also create beautiful wearable and usable textiles using our Couture ink? Let’s talk about all things inking and quilting today!
Items You’ll need for using Ink on Fabric:
Paper towels or hand towels to keep your fingers clean
Fabric item such as a pillow cover, tea towels, quilt squares, clothing
Sink
Iron or a press
Parchment paper
Creating Beautiful Quilts with Couture Inks: A Quilter’s Dream
Quilting is more than just stitching fabric together; it’s about telling a story, expressing creativity, and crafting something that is uniquely yours. Whether you’re a seasoned quilter or just beginning your journey, finding the right materials can make all the difference in bringing your vision to life. That’s where Couture Inks come in—a game-changer for anyone looking to add a personal touch to their quilting projects.
Why Choose Couture Inks for Quilting
Couture Inks are specially designed to give your quilting projects a crisp, vibrant, and lasting finish. Unlike other fabric paints or inks, Couture Inks bond beautifully with fabric, ensuring your designs remain sharp and eye-catching through every wash. Whether you’re creating a quilt for a special occasion, a holiday gift, or just as a cozy addition to your home, these inks can help you achieve professional-level results with ease.
Versatility in Application
One of the best things about Couture Inks is their versatility. You can apply them directly to your quilting squares before assembling your quilt, or you can place your designs directly onto the finished quilt top. This flexibility allows you to experiment with different techniques and layouts, giving you the freedom to create a quilt that’s truly one-of-a-kind.
Endless Design Possibilities
Couture Inks open up a world of design possibilities for your quilts. Whether you’re drawn to motivational quotes, holiday themes, or everyday sayings that reflect your lifestyle, our ink designs are here to inspire you. Imagine a quilt adorned with uplifting quotes, a cozy Christmas quilt with festive motifs, or a simple yet elegant quilt featuring classic everyday sayings. The possibilities are endless.
Crisp, Beautiful Results Every Time
One of the standout features of Couture Inks is how crisp and clean the designs come out on fabric. Even the most intricate details are captured with precision, making your quilt squares look professionally printed. The inks also blend seamlessly into the fabric, giving your quilt a smooth and polished appearance that will last for years to come.
Easy to Use, Easy to Love
Creating a stunning quilt with Couture Inks is as simple as applying the ink to your fabric, allowing it to dry, and then setting the design with heat. The process is straightforward, making it accessible even for beginners. And with a wide range of colors and designs available, you can mix and match to create a quilt that’s as unique as you are.
Get Started Today
Ready to take your quilting to the next level? Couture Inks are the perfect way to add a personal, creative touch to your projects. Whether you’re making a quilt for yourself or as a gift, these inks will help you create something truly special. So grab your fabric, choose your favorite designs, and start creating a quilt that tells your story.
Easy Application for Stunning Results
Using Couture Inks in your quilting projects is incredibly simple. To get started, just open the jar and give the ink a good mix with a stir stick. We recommend using plastic stir sticks instead of wooden ones, as wood can absorb the liquid and cause your ink to dry out faster. By mixing the ink well, you ensure that it maintains its vibrant, smooth consistency, allowing for crisp and beautiful designs every time.
Applying Couture Ink: Step-by-Step for Flawless Quilting Designs
Once your ink is well-mixed, it’s time to get started on your design! Follow these easy steps to achieve professional-looking results:
Prepare Your Surface: Place your quilting material on an ink mat. This mat serves a dual purpose: it protects your work surface from any ink seepage and keeps your fabric securely in place. This prevents any unwanted movement that could cause smears or leaks onto your fabric.
Apply Your Stencil: Next, peel your silk screen stencil from its backing and carefully position it on your fabric. Smooth it down so that there are no bubbles, ensuring that the stencil lies flat and snug on the material. This step is crucial for getting clean, crisp lines in your design.
Choose Your Ink Color: Pick your desired ink color and apply it using a squeegee. With a gentle swiping motion, spread the ink over the stencil, ensuring that the ink covers the screened areas with a thin, even coat. Remember, a little ink goes a long way!
Remove Excess Ink: After you’ve applied the ink, scrape off any excess and return it to the container. This helps you minimize waste and keeps your ink jar full for future projects.
Remove the Stencil: Carefully peel the stencil off while the ink is still wet. This ensures that your design transfers beautifully onto the fabric without any smudging.
By following these steps, you’ll create vibrant, long-lasting designs on your quilt squares, ready to be sewn into a masterpiece.
Finishing Touches: Drying and Cleaning
After applying your design, it’s important to let your fabric dry completely. You can let it air dry naturally, or if you’re eager to move on to the next step, you can speed up the process using a hair dryer or a specialized drying tool.
While your fabric is drying, take the time to clean your stencil. It’s crucial to wash the stencil immediately after use to prevent the ink from drying in the screen. Simply rinse it under water in the sink and use a board eraser to gently clean the screen. Remember, do not use soap or any cleaners—water alone is enough to do the job. It’s okay if there’s some staining on the teal part of the stencil; what’s most important is that the screen is clean and free of any ink residue.
By keeping your stencil clean and well-maintained, you’ll be able to reuse it many times, ensuring that every project you undertake with Couture Inks is just as beautiful as the last.
Proper Stencil Care: Ready for Reuse
After you’ve washed your stencil, turn it sticky side up and let it air dry for about 10 minutes. This allows the adhesive to regain its tackiness. Once it’s dry, place the paper backer back onto the stencil.
By following these steps, your stencil will be ready to use over and over again, making it easy to create consistent, beautiful designs on all your quilting projects. Proper care and storage of your stencils not only extends their life but also ensures that your future projects will turn out just as perfect as the first.
Heat Setting: The Final Step for Long-Lasting Designs
The last step in creating your beautiful quilt squares with Couture Inks is to heat set the fabric. This step can be done at any time after the ink has dried, so you have the flexibility to do it whenever it suits your schedule. In fact, you could even wait to heat set your squares when you’re blocking your quilt—it’s entirely up to you!
To heat set your fabric, I recommend placing a piece of parchment paper over the inked area. This protects your design and ensures even heat distribution. The parchment paper only needs to be used once, and after that, your fabric is ready to be permanently set.
Once your fabric is heat set, your design is machine washable and dryer-friendly, making it durable and practical for everyday use. This step ensures that your beautiful designs will last through all the love and wear your quilt will undoubtedly receive.


Get Creative and Have Fun!
Now that you’re equipped with all the steps and tips, it’s time to dive in and have a blast creating your quilt! To inspire you, here are some quilt toppers and completed quilts made using our inking system. I hope you enjoy every moment of the process and, most importantly, the stunning finished product.
Remember, I’m always here to help and assist you along the way. It’s one of the perks of having me as your designer! Don’t hesitate to reach out if you have any questions or need guidance.
Thank you for letting me share this new passion of mine with you—I can’t wait to see the beautiful quilts you create!